System administration for junior devs: Setting up a virtual server with Vagrant

When you’re learning about system administration, it is helpful to have a private server to muck around on so that your mistakes do not affect users. Fortunately, you can use a tool called [Vagrant](https://www.vagrantup.com/) to easily create virtual servers on your development machine. This tutorial requires Vagrant, so you will need to follow [these instructions](https://docs.vagrantup.com/v2/installation/) if you do not have it already (it is pretty easy). You will also need [VirtualBox](https://www.virtualbox.org/wiki/Downloads).
This blog post aims to help developers create a virtual server while also explaining what, exactly, that means.
### 1. Creating a clean virtual server
For this tutorial, I have predefined some _very_ vanilla Vagrant settings to get things started. To grab those, run `git clone https://github.com/handlers/servers.git`.
Now `cd` into that directory. `ls` and you’ll see that the repository has a `Vagrantfile` which contains details about the server that Vagrant is going to create. If you poke around that Vagrantfile and `ctrl + f` for “config.vm.box,” you should see a line that looks like this: `config.vm.box = “ubuntu/trusty64″`. This tells Vagrant that our server should come preloaded with the [Trusty release](https://wiki.ubuntu.com/TrustyTahr/ReleaseNotes) of the Ubuntu operating system. You should also note that this Vagrantfile specifies a [_private IP_](https://www.arin.net/knowledge/address_filters.html) address of `192.168.33.11`.
### 2. Creating your virtual server
We will now use Vagrant to create a virtual server on your computer. Make sure you’re in the project directory you cloned from GitHub and run `vagrant up`. (It may take a while to download the Ubuntu base image.1) Eventually your terminal should spit out something like this:
“` ==> default: Machine booted and ready! ==> default: Checking for guest additions in VM… ==> default: Configuring and enabling network interfaces… ==> default: Mounting shared folders… “`
### 3. What it means to have a virtual server
When you run `vagrant up`, you create something that walks and talks like a real server, but it is actually running within your own computer. For our purposes, it is important that the virtual server is _networked_. We can prove it by pinging the IP referenced in the Vagrantfile (`192.168.33.11`).
“` $ ping 192.168.33.11 PING 192.168.33.11 (192.168.33.11): 56 data bytes 64 bytes from 192.168.33.11: icmp_seq=0 ttl=64 time=0.385 ms ^C — 192.168.33.11 ping statistics — 1 packets transmitted, 1 packets received, 0.0% packet loss round-trip min/avg/max/stddev = 0.385/0.385/0.385/0.000 ms “`
As you can see, we are getting packets back from the IP address we just created.
Vagrant also preloads the machine with a user named `vagrant`, and you can `ssh` into the machine as this user. Try running `vagrant ssh` from within the project directory.2 You should see a prompt like this:
“` vagrant@vagrant-ubuntu-trusty-64:~$ “`
It allows you to do everything you can do on a regular server, from checking out the machine’s OS to poking around its directory structure.
“` vagrant@vagrant-ubuntu-trusty-64:~$ uname -a Linux vagrant-ubuntu-trusty-64 3.13.0-39-generic #66-Ubuntu SMP Tue Oct 28 13:30:27 UTC 2014 x86_64 x86_64 x86_64 GNU/Linux
vagrant@vagrant-ubuntu-trusty-64:~$ pwd /home/vagrant
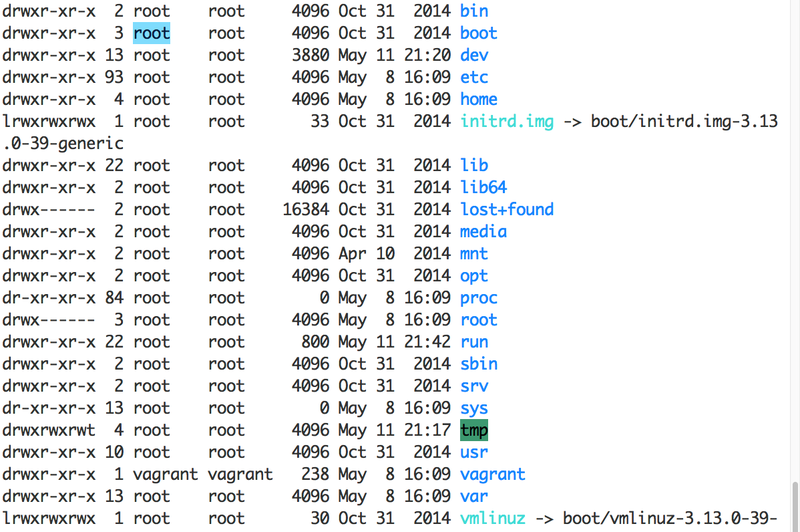
vagrant@vagrant-ubuntu-trusty-64:~$ ls / bin dev home lib lost+found mnt proc run srv tmp vagrant vmlinuz boot etc initrd.img lib64 media opt root sbin sys usr var “`
You now have a virtual Ubuntu server running on your computer, complete with `ssh` access. `cd /` and take a little time to check out what’s going on. It might be helpful to check out this Wikipedia article on [Unix’s normal directory structure](http://en.wikipedia.org/wiki/Unix_filesystem#Conventional_directory_layout). Many, many websites run on computers that have directories laid out like this. Don’t worry about messing some part of your server up — creating a fresh image is as easy as bringing down your existing server with `vagrant destroy` and then running `vagrant up` again. Remember that these commands (`vagrant ___`) should be issued from your computer, not from within the virtual machine.
You have now completed the first step in understanding how your server fields Web requests, creating a very basic, networked virtual server. You are controlledly replicating the Internet on your development machine. Stay tuned for part III, in which we configure our server to handle HTTP requests with NGINX.
### Extra credit
If you _really_ want to get down into the guts of what’s going on, try `ssh`ing into your virtual server and running `tcpdump -i any icmp[icmptype] == 8` to see what happens when you `ping` it. It is pretty cool!
—–
1 The wait is more bearable when you realize you are basically downloading a whole computer!
2 It is worth noting that you did not run your system’s standard `ssh` command, but rather a Vagrant utility called `ssh` which opens a shell session on the virtual machine. You can, however, also run `ssh vagrant@192.168.33.11` with password `vagrant`.

